BREAKDOWN
Chase Scene
This project was the most arduous project I had worked on during my time at gnomon. With the time I had, efficiency was key to getting this completed. The first thing I had to tackle was getting the camera work down first. Then I'd be able to only focus working on elements that will only be seen through the camera.
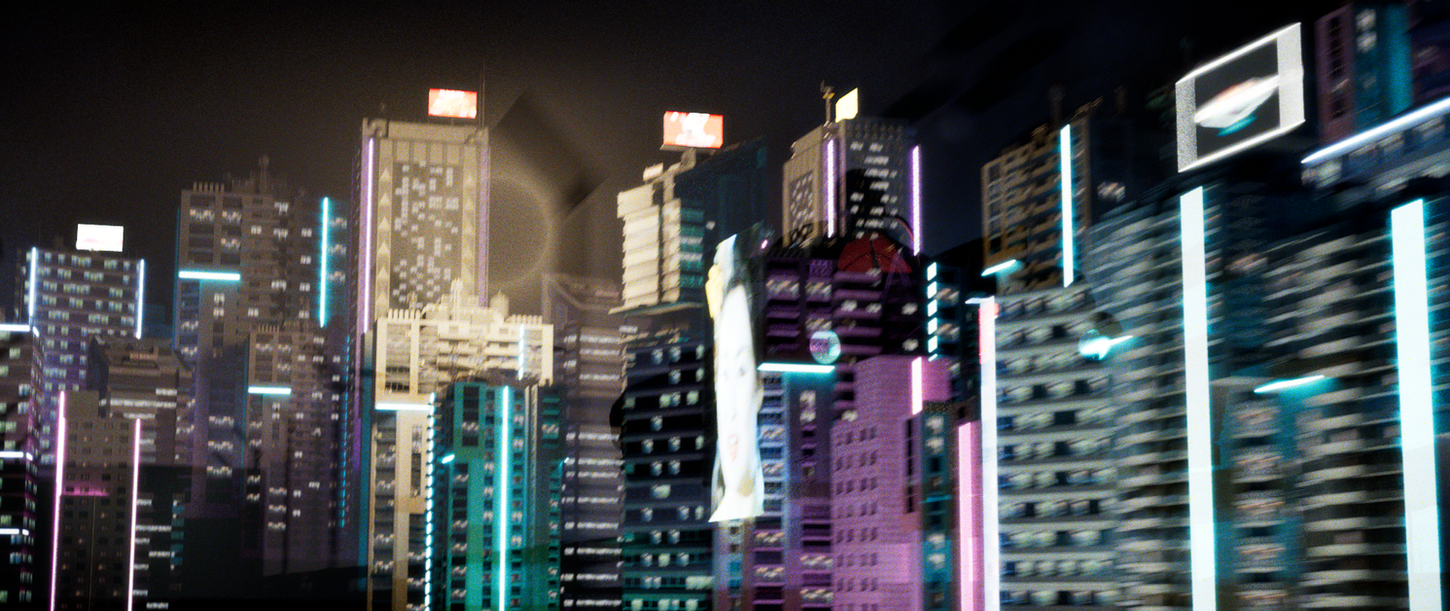
Soon after establishing the camera the next thing was to block out the vehicles and get the animation to look good. Once I was satisfied with the animation it was time to start creating the environment. I wanted to go for a futuristic sci fi feel with inspiration drawn from the Blade Runner film and the Cyberpunk video game. The main red vehicle I had modeled for a previous class that I utilized for this animation as the style fit the tone of some kind of rebellious biker trying to escape the cops. The concept was originally designed by Michael Kus. As for the police car, my primary references were police cars from the 70s specifically a 1977 Ford LTD LAPD police car. With that as a base I created my cyberpunk like police car.
As far as the set pieces go, I used a combination of third party I gathered on the internet and models made by me. Given the time I had, I determined it'd best that I use a third party asset for the city buildings. The free sample pack from kitbash 3D was perfect for the genre I was aiming for. However I did not use the model as is. I removed parts of the buildings windows and replaced it with a 3D project office room with each building having a different variation. This helped give it a more believable realistic feeling of a populated city. Furthermore I added billboards with different types of ads and cylindrical emissive lights to each building to emphasize the cyberpunk genre.
The foreground tunnel and roads were modeled by me, then I used megascan assets to further decorate the roads. Despite the motion blur covering up the the details I did not slack making sure it would look good even for a still image.
Below were test comps I had done to see if I was ready to move on to doing the final animation renders

When it came to compositing I made sure to render out using light selections. With light selections this enabled me to have more flexibility in comp. For example, the slides below shows how I used light selections to rebuild my scene and make specific changes to my scene. Even though rebuilding a scene via light selections takes more time depending on how many lights are in the scene, I personally prefer this methodology over rebuilding the scene by adding the diffuse pass, the reflection pass, the gi pass etc. The ability to change the color and intensity of the light gives me more control and artistic direction in the compositing phase.
I had also utilized render layers for this project. With it I was able to render separate foreground and background elements which helped me make changes to one layer without having it affect another layer in comp. It was as much as a necessity to use it for this animation as much as it was a time saver. Rendering one frame with no render layers would've taken at least 24 hours for one frame vs dividing it into different render layers allowed me to be more efficient, by rendering the different layers on multiple computers at my school.
Below you can see how I assembled the exterior shot via render layers.
As for the hover bike itself, this was a long, but fun vehicle to model. The main appeal was the futuristic design but with a style from the 70s. It's definitely one of my most proudest things I've modeled. The curvature of the vehicles was challenging, but I eventually found a way to make all the topology flow efficiently. For the internals of the bike, I utilized kitbash assets to fill up the empty spaces. Even though it is not seen enough because of the lighting, you can feel the complexity of the vehicles and believe its a functional hover bike.
Mech
This project is my personal favorite. I'm a big fan of giant robots and mechs so doing one during my time at gnomon was a must. I came across the concept art for this mech on art station a few terms before I started to model it. I began first by bring in the concept art into Maya and adjusted the scale of the image reference to be 12 ft tall. Afterwards I began blocking out the general shapes of the mech and focused on making sure I got the proportions correct. After that I started refining pieces of it until it matched the exact look of the concept.
After I had finished modeling it I moved on to the texturing portion. At first I had gathered references of various tanks thinking that those types of textures might work well, but ended up looking too flat over all given most tanks have a very high roughness. What I ended up doing was actually looking at robots in films, primarily transformers because they were very convincing as being giant metal robots texturally. I used that as a base of reference, while still referring to some tank references because I still wanted it to give it a higher roughness.
When it came to the environment I discovered a concept art that I thought was perfect in the aesthetic I wanted to create for this mech. However, given the short time I had I had to play it smart. So I created a several main pieces that occupied most of the scene and went for a moody lighting which worked in favor of my original goal while only seeing what I wanted the viewers to see. In addition I created another hero asset of mechanical arms, aside from the mech that would take up a majority of the scene. Without the mech in the scene these mechanical arms would be the main subject of the animation.
I had a fun time modeling these mechanical arms. I utilized a few kit bash pieces to help add complexity to the mechanical arm. I did some of the design process in Zbrush and then brought into Maya to retopologize. Afterwards I made sure to give the same treatment of textures as I did them mehc. I added text and additional decal which helped provide a sense of scale to the scene.
Fallen Ship - WIP
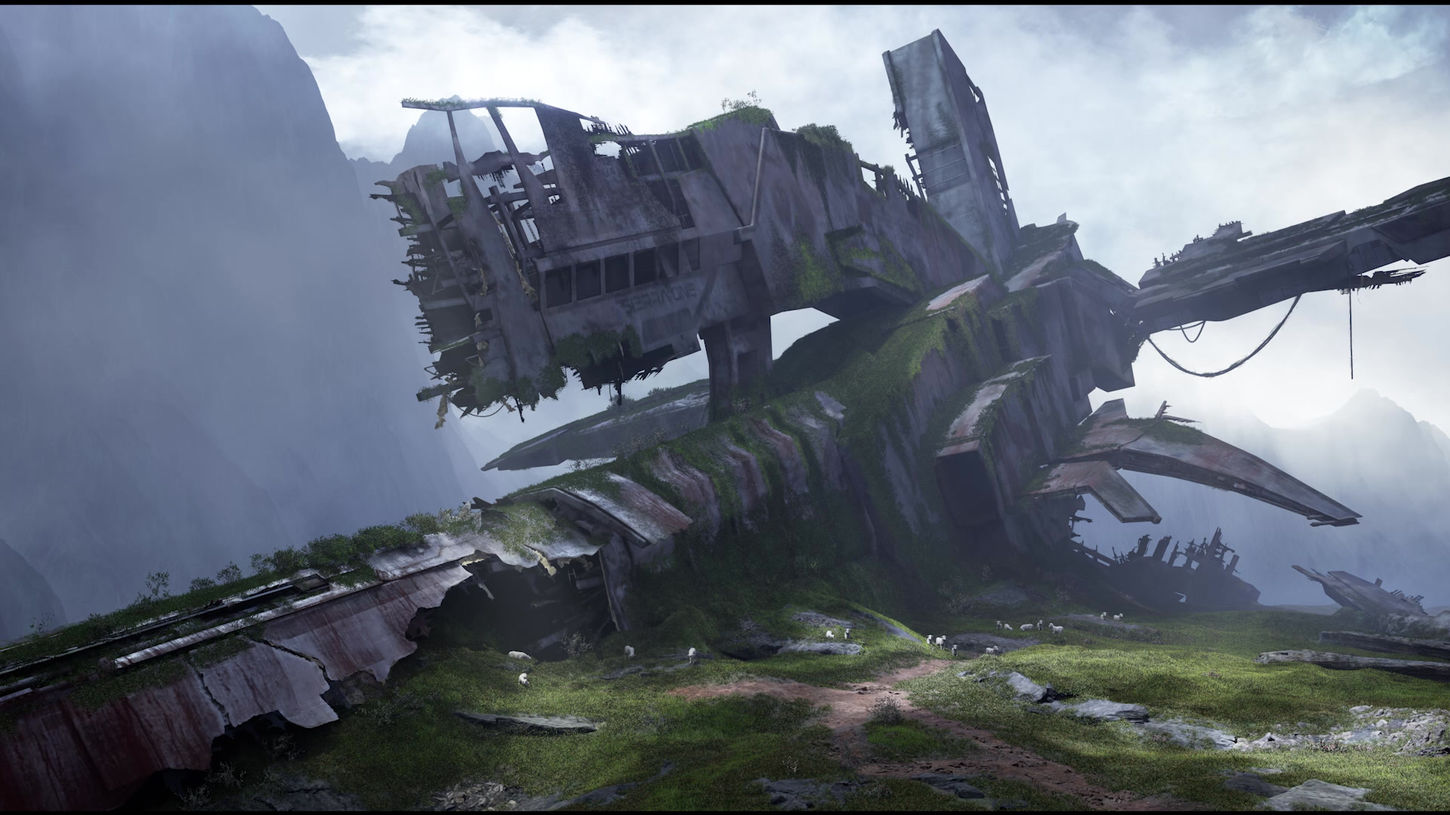
Originally I was planning on doing this project in Maya, however, due to the large scale and amount of plants and grass that had to be scattered it proved to be strenuous on my pc. The results weren't the best either primarily because of the inability to IPR my scene quickly. If I had wanted to make a change and see what it would look like it would take my computer up 30 min to prepare the render and maybe another 15-20 min to actually see something. That on top of a large file size pushed me to make a switch to using Unreal Engine 5. The real time lighting with lumen enabled me to progress my environment with ease while still achieving a high quality render. This was my first big project using Unreal, so it allowed me to learn more about the program. While the real time render is amazing, there were moments where I clearly understood that I was using a game engine first and a cinematic render engine second.
The modelling of the ship, contrary to what most people who I showed it to thought, was actually not the most difficult part of this piece. Since the majority of the ship consisted of basic blocks, it didn't take too long to model. When it came to the torn pieces of the ship, I primarily used the polycut tool to get the shapes that I wanted. From a distance it looks fine and it does work when you move closer up, but looking back on it, I'd wish I had brought into Zbrush to really add some detail into it. I also created alphas which I used as cards to add additional break up around the edges of the ship adding to the overall silhouette.
This project is the only one that required a large terrain to be created for the mountains and the landscape the ship is on. For this I used Gaea. It was great being able to procedurally create the type of landscapes I wanted, however when it came to the foreground terrain, it was a bit harder trying to get the look I wanted, particularly with the ship looking as if it's dug into the ground. The workaround I had done for this was by first going into Mudbox and importing the ship and sculpting around the ship. After I got a decent block in, I exported the displacement map and brought it into Gaea. From there I was then able to add details on top of it while it maintaining the original shape I had intended. After I was done, I brought it back into Mudbox, to move some of the terrain around to make sure it properly fit the ship just how I wanted it to be.
Bringing with all the elements brought into unreal, you can see how the pieces fit together layer by layer. The foliage probably the best part when I brought it into Unreal. Their foliage tool made it much easier to scatter the grass and plants along the ground and on the ship. It allowed me to better art direct my scene as well. When you look at the second to last thumbnail and the last thumbnail you can notice the background sky looks dramatically different. Unreal does have built in volumetric clouds, however I preferred a different method in achieving the clouds by using cards. For the purposes of my scene, it worked extremely well and using the EasyFog asset pack from the Unreal Marketplace created by William Faucher I was able to art direct the scene even more elevating it to the final image you see now. At the moment it is still a work in progress so this is not the final state.
Aston Martin Vulcan
This car was one of my earliest projects in terms of modeling. It was also one of my first attempts and modeling any sort of complicated curvature. It was a real challenge for me but I learned a lot and enjoyed the process.
As my fourth demo reel piece I wanted to revisit this car. I noticed that there were some pieces that were not finished yet such as the brake calipers. Since it was a piece I was proud of I decided to finish the remaining pieces and throw it into Unreal to make an animation from it. I really wanted to show off the curvature of the car so I went for a dramatic single light source moving along the car so you could really see and appreciate the design aspect of the actual car itself.
As a result I am quite happy with this piece. I love car designs in general so it was a fun car to model.


